How to take better photograghs
Photography can seem a daunting subject with lots of complex jargon and expensive equipment. But there are many simple things that you can do to improve the quality and impact of your photographs, without an expensive camera. In fact, many of my tips can be achieved with your smartphone. These tips are broken down into the five main categories below. Also check out some recommendations for equipment to get you started.
Learning to see
My biggest personal learning in photography has nothing to do with technique or equipment. It was learning to see. By that I mean being aware of my surroundings and being able to visualise what I want a photograph to look like before I take it. Using that insight I can adjust my composition, choose a time of day, change camera settings and know what to include or exclude.
That may seem like an abstract concept, but it is what separates a “snapshot” where you fire off the camera without thinking, from a photograph that is a deliberate and considered artistic choice.
A little thought and preparation can make a huge difference to your photographs. Always pause and analyse what you are photographing before you press the button. Identify the “thing” that first caught your eye and move yourself or adjust your camera to capture it in the best way possible.
My top tip is to look for simplicity and eliminate as many unwanted distractions as possible to make for a more impactful photograph.


Notice how the early morning light caught these autumn leaves and made them stand out.
Light
Photography literally means “painting with light” – everything that you do with your camera comes from capturing light.
Often the same scene can look completely different depending on the light. Early morning and late evenings create softness which is great for portraits. In Winter the low angle of the sun creates long dramatic shadows. Whereas the harsh midday summer sun can be ideal for contrasty street photography and strong patterns.
The colour quality of the light can alter the mood of a photograph too. The time after sunrise and before sunset are often referred to as “golden hour”, creating a warmth which is soft and dreamy.
How you position your subject relative to the light can make a dramatic difference. Having direct light shining into peoples faces often makes them squint. Try instead having your subject at 90 degrees to the sun to create some depth and relax their face.
In situations where the light is unflattering or the environment is too dark, flash can be used in addition to natural light. Always try to point the flash away from your subject and towards a reflective surface like a wall or ceiling to create a softer light.
My top tip is to find a scene that you find interesting and revisit it at different times of the day or year to get dramatically different results.
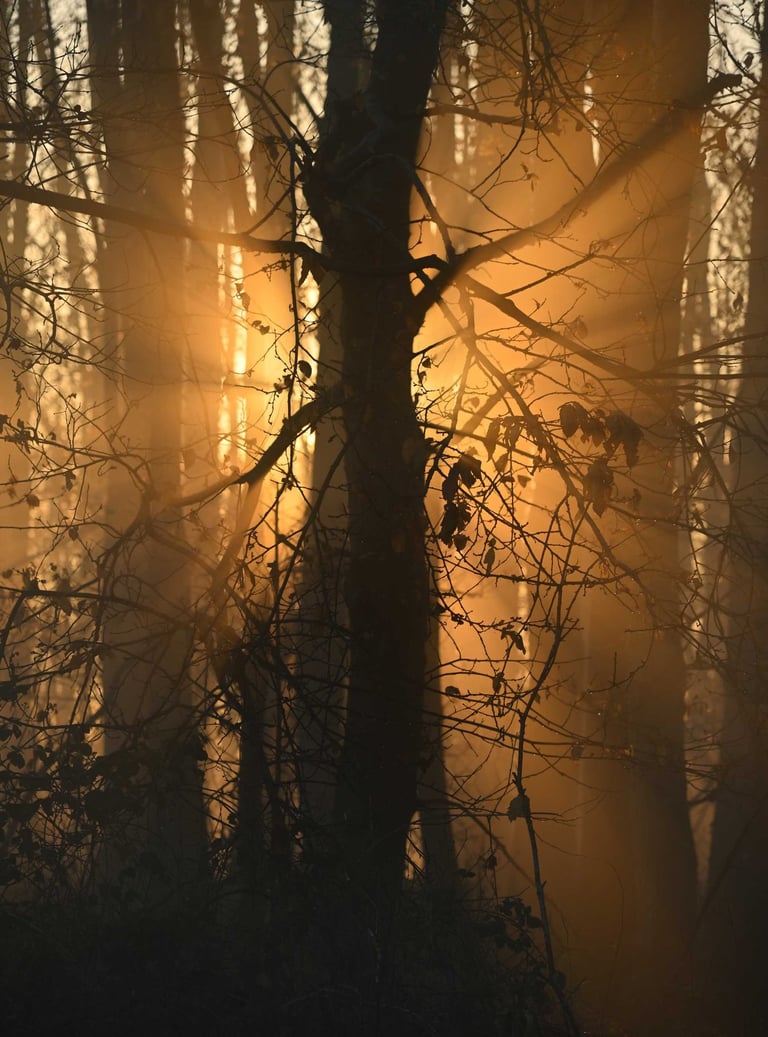

An ordinary tree is transformed by the sun rising through the mist behind it.
Composition
How you arrange the elements in your photograph is critical. Don’t just look at the subject but keep a close eye on the background too. If there are obvious distractions such as trees, bins or cars try to move yourself or your subject to eliminate them. Look out for reflections on shiny surfaces too.
If you can’t eliminate distractions then try to blur them out. The closer you are to your subject relative to the background the more out of focus or blurred it will be. Using a wide aperture or longer focal length will help in this regard too.
Think about where your subject sits in the picture – don’t just place everything in the middle. The “rule of thirds” is a good alternative - try to position the thing you want the viewer to focus on, one third from the top or bottom of the frame and one third from the left or right. Using this looks more balanced and professional. Most cameras will superimpose a grid on your viewfinder to help you too.
Use the whole picture area but try not to overfill it. If you are photographing a moving subject such as a car or a bike, keep some space Infront of it to suggest movement. Also think about how your orientate your camera – either in “portrait” or “landscape” to match the shape of your subject.
Taking pictures at eye level may seem natural, but it can become boring. Think about a lower vantage point or approaching your subject from an angle to create some variety.
Look for natural “frames” for your subject like an archway or the branches of a tree. This helps draw attention to your subject. Also, pathways are a good way of leading the viewers eye towards your subject.
Also consider colour. If you can position your subject against a contrasting background it will really make it “pop”. For example, a yellow car in a row of grey or black cars will really stand out. Alternatively, eliminating colour completely can turn a boring scene into something really dramatic.
My top tip is to always take more than one picture. Keep asking yourself if there is a better angle or composition. You will almost always get a stronger image as a result.
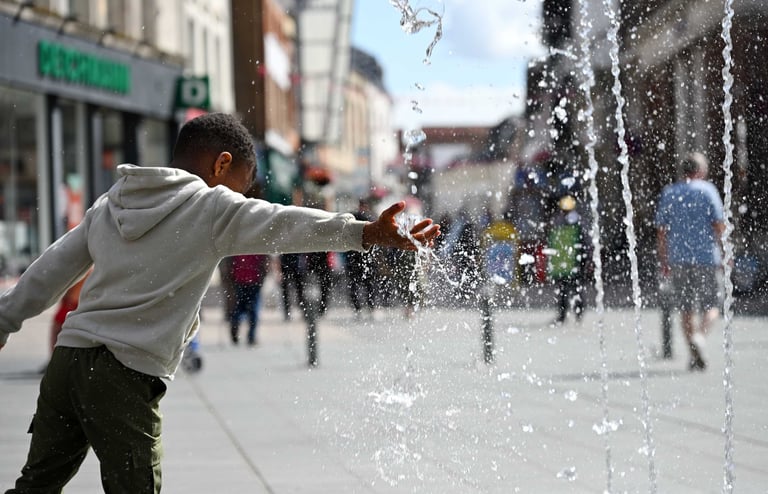
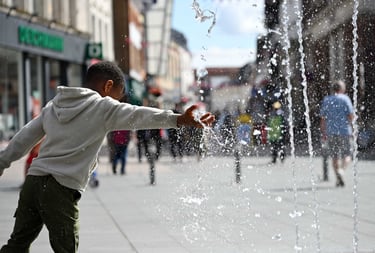

Bluring the background brings focus to the boy whilst still conveying the sense of a town centre street.
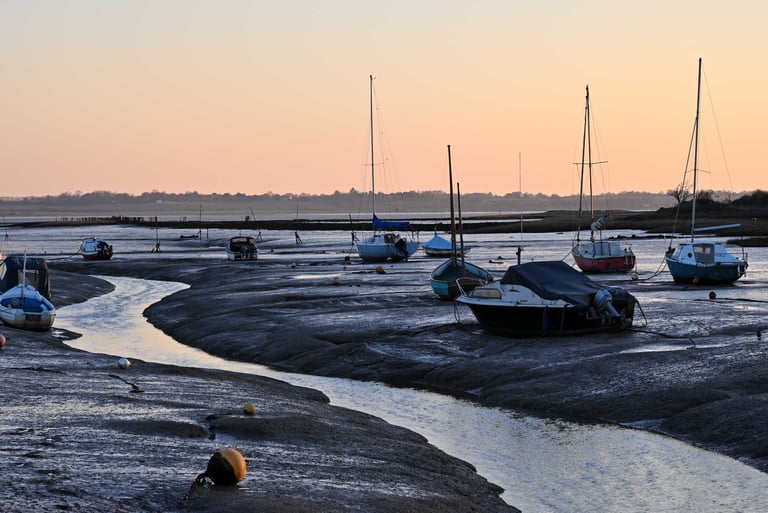
The line of the river at low tide guides the viewer through the scene
Camera settings
Cameras can seem complicated and there is a temptation to leave everything set to “auto”. But there are several settings that you can experiment with to start with which once understood will greatly improve the quality of your pictures.
The focal length of the camera lens – usually measured in millimetres - alters the perspective of the image. Wide angle lenses (like 24mm) capture more of the scene which can be helpful for landscapes, but they tend to distort faces and bring a lot of different elements into the frame which can be distracting. Longer focal lengths (like 70mm) help you get closer to your subject and compress the background. This is more flattering for faces and helps you to isolate your subject. Even a simple zoom lens or a smartphone with multiple lenses that covers a range of focal lengths can greatly increase your creative options.
How your photographs are exposed is a dependent on three factors – aperture, shutter speed and sensitivity (or ISO). Changing one factor means that one or both of the others must also change to maintain the correct exposure. This relationship is known as the “exposure triangle”.
The lens aperture controls how much light the camera captures. “Wide” or “open” apertures let in more light but also help to blur the background. This can be a great way of separating your subject from a potential distraction. Equally “narrow” or “small” apertures keep more of the image in focus and can be useful when photographing landscapes. In the vast majority of situations, I select my desired aperture and let my camera choose an appropriate shutter speed and ISO.
The shutter speed (measured in fractions of a second) controls how long the cameras sensor is exposed to light. Choosing a “fast” shutter speed like 1/500th of a second helps to freeze the action – great if you have a moving subject like a car or a bird. A “slow” shutter speed like 1/30th of a second can be used to deliberately blur elements of the scene to create the effect of movement – try this when photographing a stream or waterfall. If you want to use very slow shutter speeds it may be difficult to hold the camera steady – in which case resting your camera on something sold like a wall is a cheap way of supporting it.
Finally ISO can be useful when your choice of aperture and shutter speed would result in an underexposed photograph. Unfortunately, increasing sensitivity can result in more “noise” and loss of detail in your photographs. So normally I set ISO to auto and only worry about it when it starts to impact image quality.
My top tip is to ignore the jargon and experiment with these settings to see what effect they have and how creative you can be.
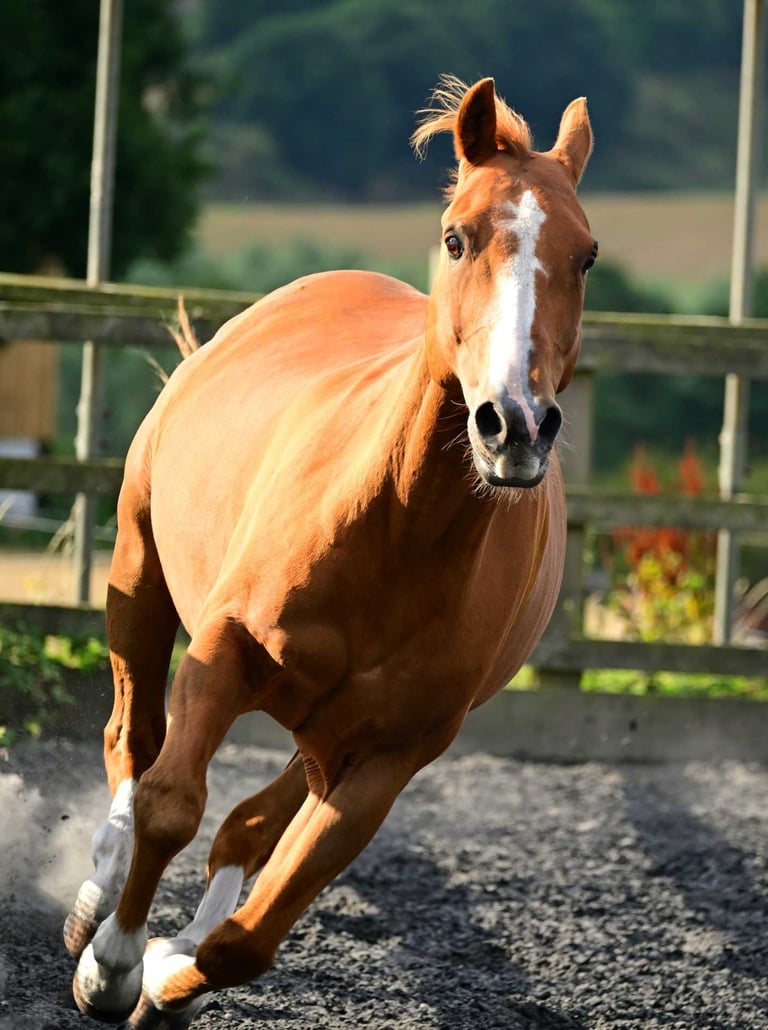
A fast shutter speed freezes the action

A wide lens aperture creates a blurred background
Editing
Editing your photographs is a much a part of the creative process as light and composition. Done in a sensitive way it can really enhance your photography, bring the end result closer to your original vision and what you experienced on the day.
Editing software can be as complex and expensive as a camera equipment. When first starting out, look for something easy to use that gives you access to the basics and work up from there.
Try to avoid filters or presets as these can change many things in unpredictable ways. Instead try the following settings.
Contrast – this changes the difference between the darkest and lightest tones in your image. Increasing contrast creates more punch, whilst decreasing it gives a dreamier effect.
Colour saturation – this works best when you can choose to increase or decrease the intensity of each colour separately. Use it to highlight specific colours that you want to draw attention to or reduce those in the background.
Cropping – sometimes even with careful composition an image can be spoilt by a distraction that you didn’t notice. Or perhaps you didn’t position your subject in quite the right place. Cropping is like a “second chance” for composition.
My top tip is always to use these tools sparingly – over edited photographs can look fake.
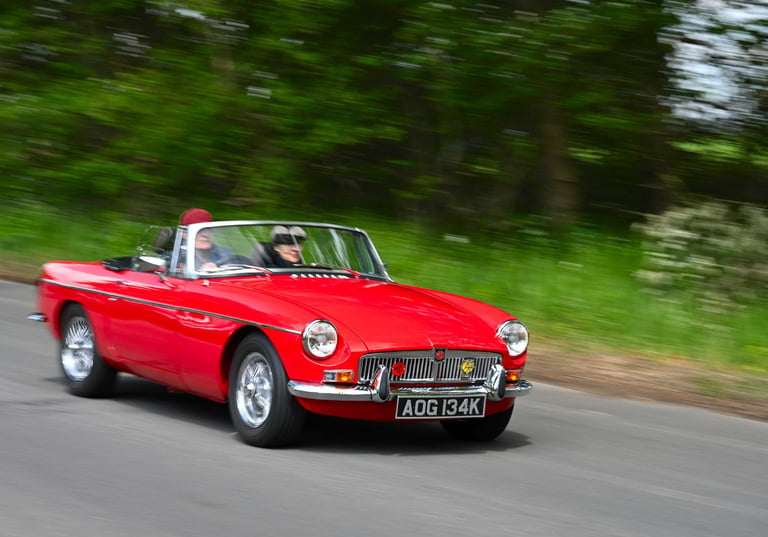

Enhancing the red colour and increasing the image contrast makes the car pop
Equipment
You don’t need the latest and most expensive equipment to take better photographs. In fact, in many cases a smartphone is all you need.
Unfortunately the iPhone doesn’t allow for manual control of many camera settings, so to have more creative control it is worth considering a dedicated camera. For beginners I would recommend the following.
A camera “body” that
allows manual control – most dedicated cameras will have Aperture, Shutter Speed and full manual settings
works with different lenses
will accept a flash unit
Don’t worry too much about camera resolution – more megapixels won’t make much difference unless you are intending to make huge prints. And features like autofocus and image stabilisation are standard these days.
Cameras that use a “cropped” image sensor tend to be cheaper and lighter than “full frame” cameras – and they work with lenses that are smaller and cheaper too. Just make sure that a lens will fit your camera body – different manufacturer use different standards.
An “everyday” zoom lens that allows you to change the focal length – a range between 24mm and 70mm (full frame) or 18mm and 55mm (cropped) is a great place to start as it will be lightweight and inexpensive but give you many more options for composition.
Optionally look at also purchasing a fixed focal length lens with a wide maximum aperture. Most manufacturers make a 50mm f1.8 lens that is inexpensive. This type of lens will give you much better background blur than a standard zoom lens. It will also force you to move to adjust your composition rather than relying on a zoom. It will transform the look of your photographs if used correctly.
A flash unit or “speedlight” that allows you to swivel the flash head is useful too. This will allow you to bounce the flash off walls or ceilings and makes a huge difference to the look of pictures taken indoors. It can also be used in daylight to “fill in“ harsh shadows.
Finally a compatible memory card that is big enough to hold a few thousand pictures – 32Gb should be fine.
Look at second-hand equipment – there can be great bargains in cameras and lenses, especially if you are buying something that is not the latest generation. Sellers in the UK like MPB, Park Cameras, London Camera Exchange and Wex all provide warranties for peace of mind and will give you advice.
Here’s a sample second hand equipment list based on the recommendations above (2026 prices – all in “good” or “very good” condition). For less than £500 you can build a camera kit that will be vastly more flexible and creative than a Smartphone.
Nikon D5300 camera body (Mid-range SLR crop sensor camera with good low light and autofocus performance) £225
Nikon 18-55mm DX lens with VR (Basic zoom lens with Vibration Reduction) £70
Nikon 50mm f1.8 lens (Wide aperture lens - 75mm equivalent on this camera body) £90
Nikon SB400 speedlight (Simple flash with adjustable head) £65
SanDisk Ultra SD 32Gb memory card (High speed memory card - New price) £20
Total £470